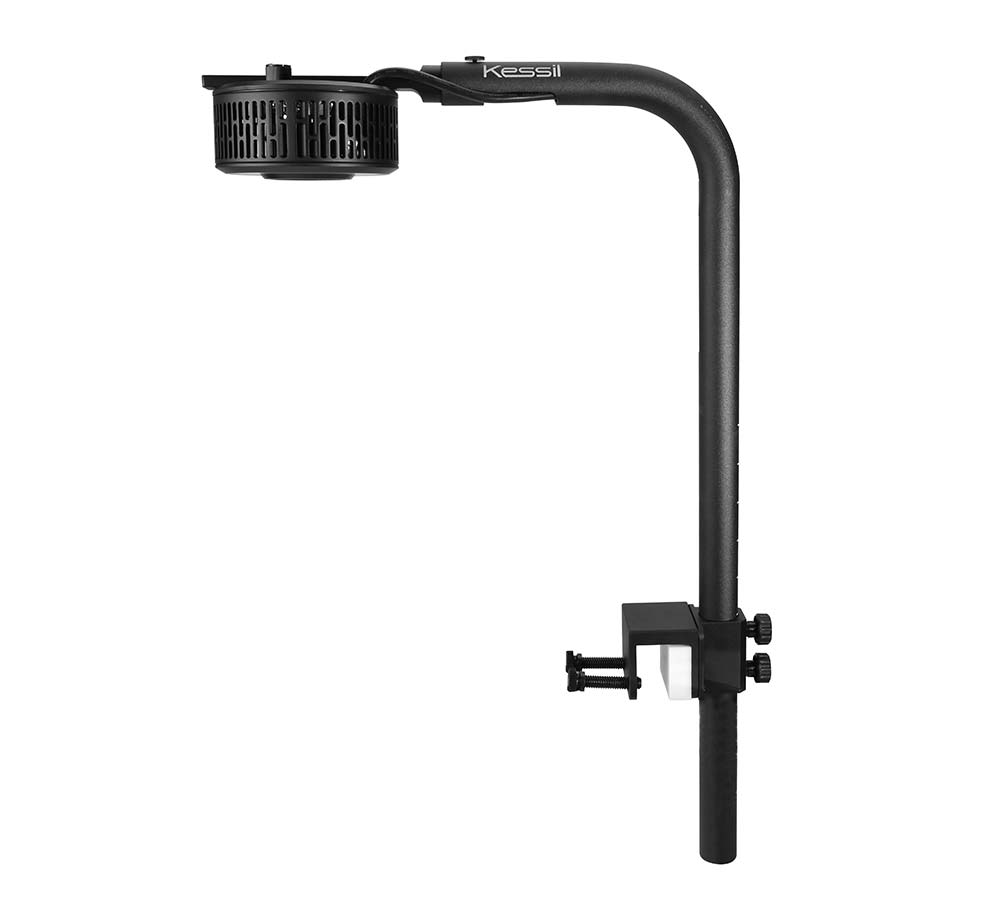
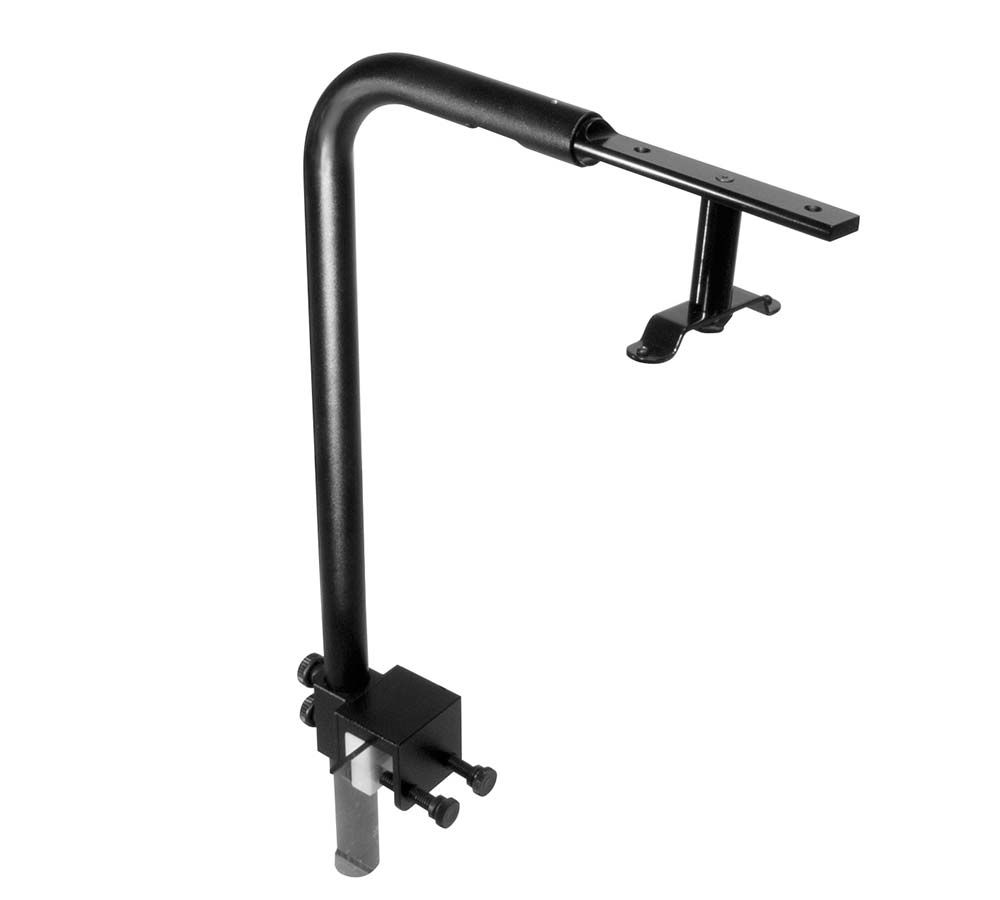

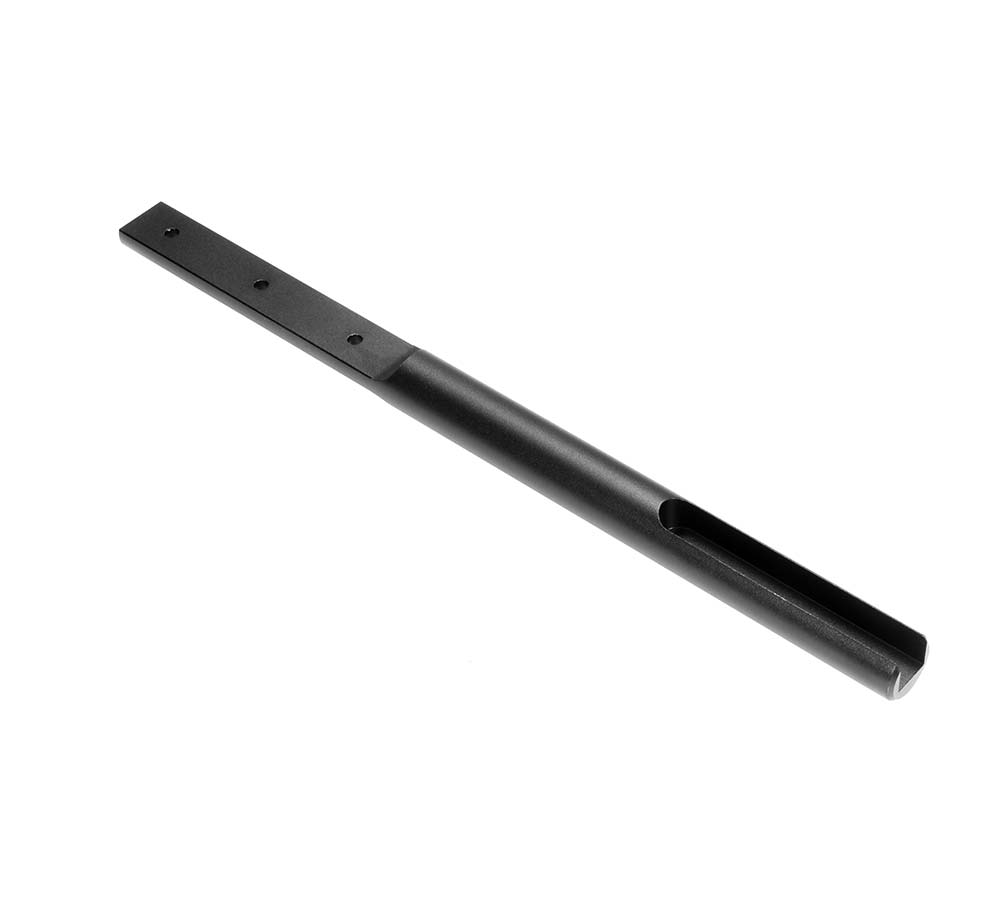
Mounting Arm
Part Number
KSAGN02
Weight
1.76 lb / 0.8kg
Arm Dimensions
ø 1" x W 12.32" - 15.43" x H 20.78" /
ø 2.54cm x W 31.29cm - 39.19cm x H 52.78cm
Maximum height
17 inches above surface
Color
Black
Product Information
Overview
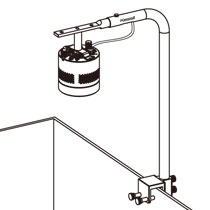
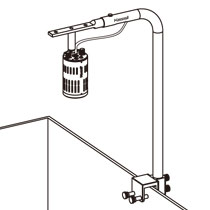
Kessil's Mounting Arm is a premium mounting option that allows you to install Kessil Aquarium Lights directly to your tank. The Mounting Arm is adjustable in heights and from back to front (for 18" - 24" wide tank), together with advanced cable management to house the cable inside the arm, providing a perfect and sleek mounting option for rimmed and rimless tanks. It is compatible with A160, A360W/NE, A360, and AP9 (2 required for AP9).
Separator
What's in the Box
Arm (x1)
Slide Bar-1 (225.3mm) (x1)
M4 Round head hex screw, L=8mm (x4)
Arm Mount (x1)
Tube Adapter (x1)
M4 Flat head hex socket cap, L=15mm (x2)
90 degree adapter (For A160&A360) (x1)
A3XX bracket (x1)
Plastic Stepper (x2)
M3 Thumb Screw (x1)
M5 Flat head phillips cap, L=10MM (x4)
M5 Thumb screw (x2)
2.5mm M4 hex key (x1)
Thumb Screw 3/8-16 (x2)
M3 Pan head phillips cap, L=12MM (x4)
Compatible with
A500X Tuna Blue
A360XE Tuna Blue
A360XE Tuna Sun
A360X Tuna Blue
A360X Tuna Sun
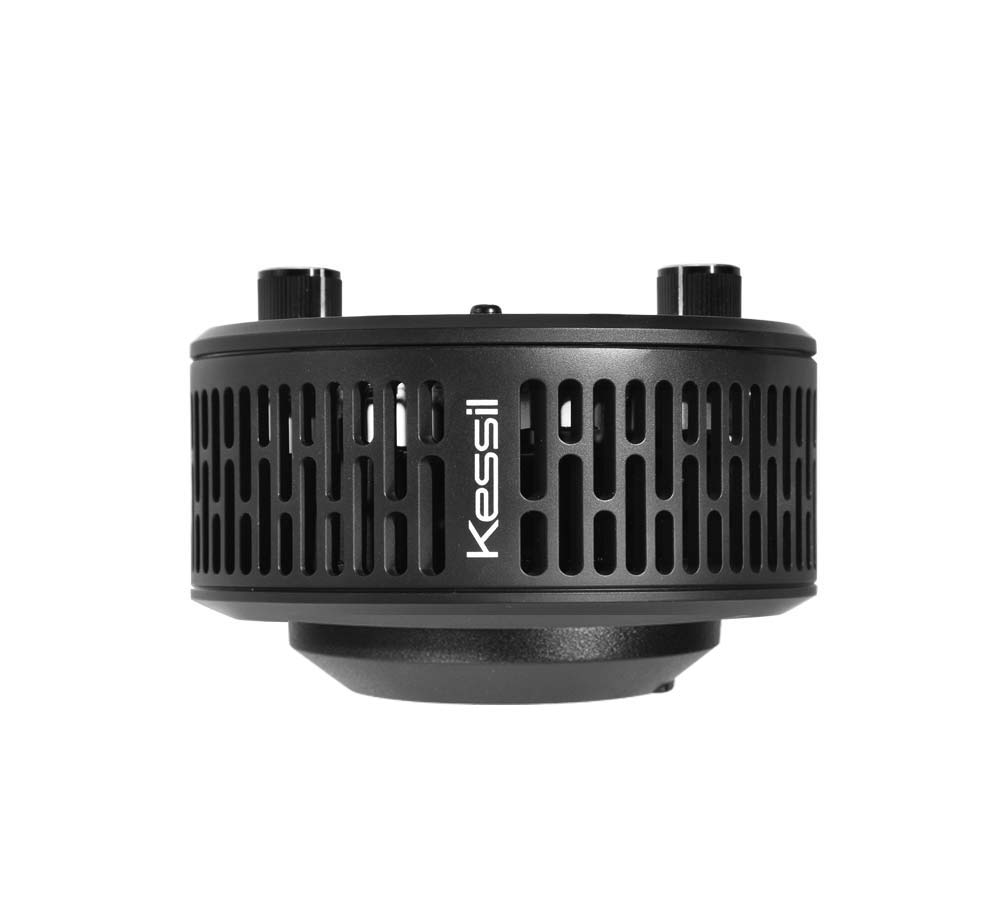
A360X Refugium
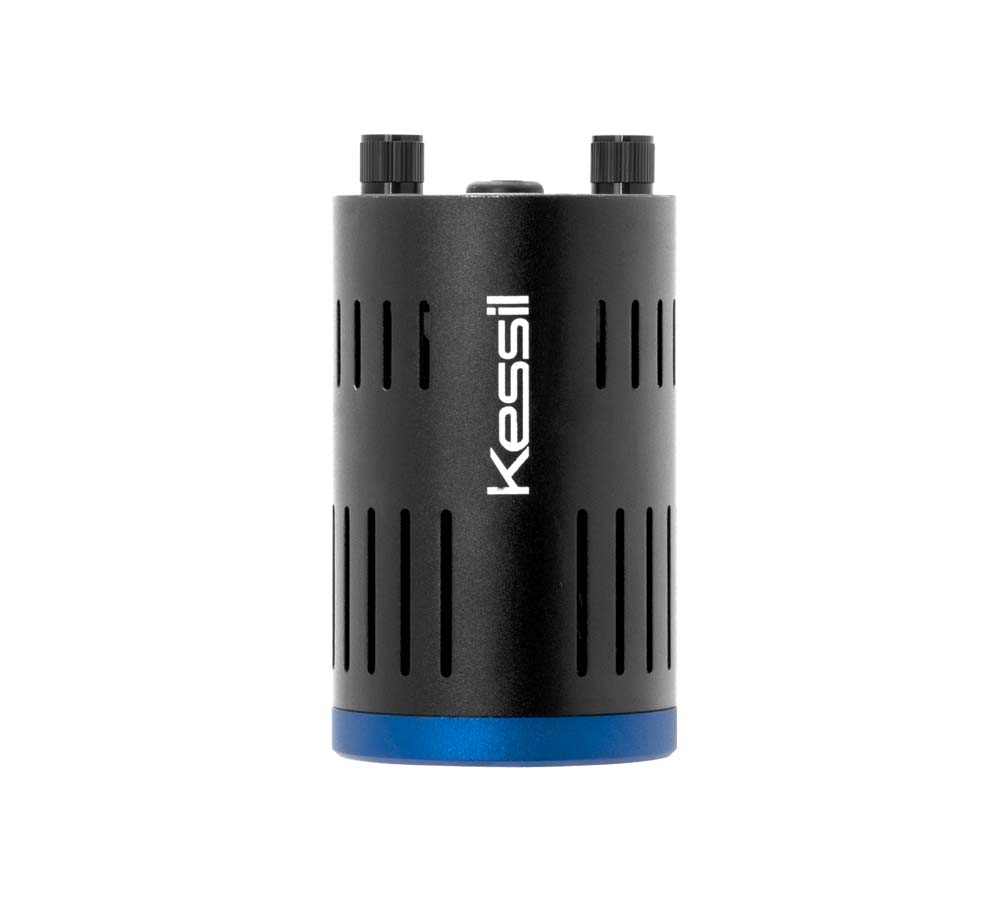
A160WE Tuna Blue
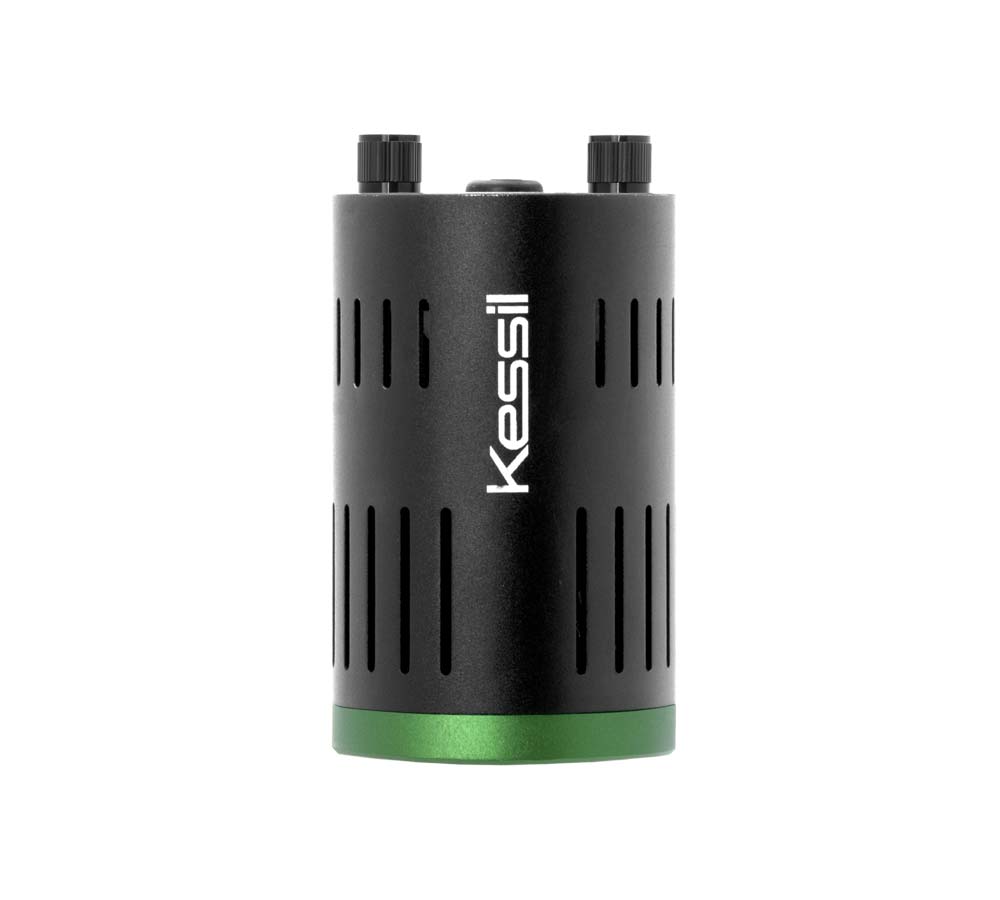
A160WE Tuna Sun
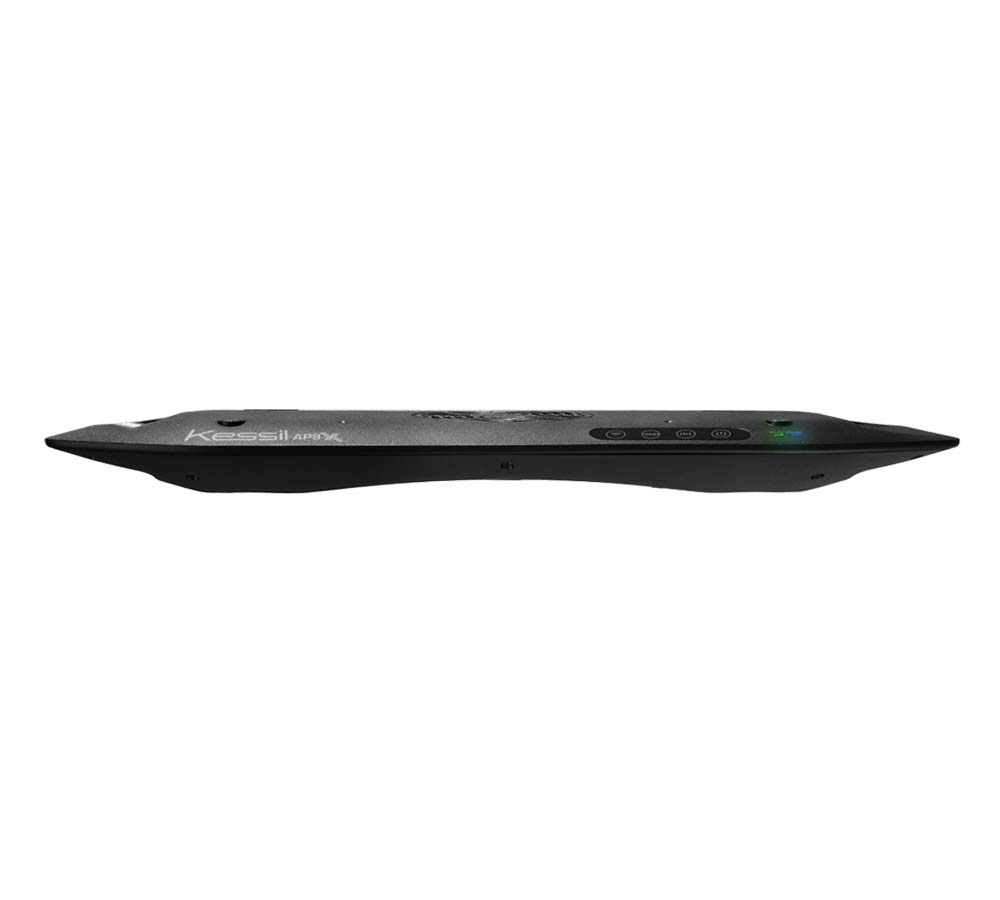
AP9X

Extension Mount
Extended Slide Bar
1
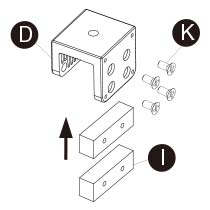
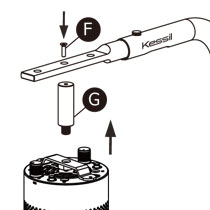
Insert two steppers I into the Arm Mount D and secure them with four M5 Phillips Cap screws K, using a Phillips screwdriver.
*Optional. Recommended for rimless aquariums.
2
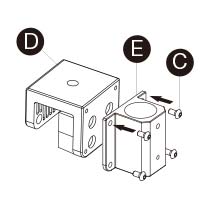
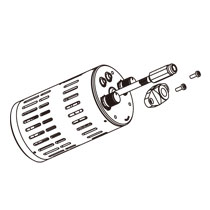
Insert four M4 Round Head Hex screws C through Tube AdapterE and into Arm Mount D. Secure with M4 Hex Key M.
3
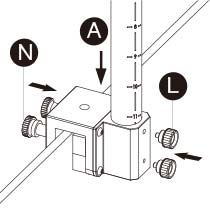
Use two Thumb screws N to secure Arm Mount D to aquarium. Put Arm A into the Tube Adapter E and adjust to the desired height. Markings facing the back. Secure them with two M5 Thumb screws L.
4
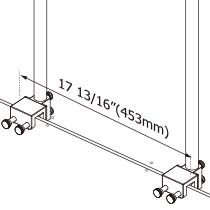
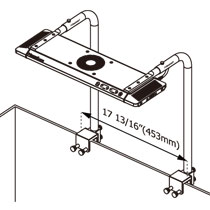
The best distance between the far ends of two Arm Brackets D is 17 13/16" (453mm).
5
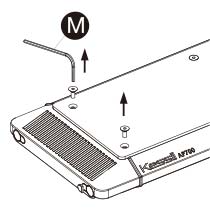
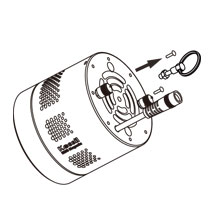
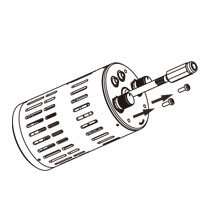
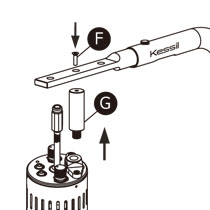
Remove the screws from the top side of APXX, using M4 Hex Key M.
6
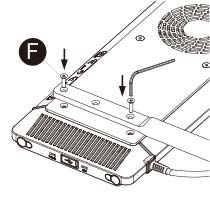
Use M4 Hex Key M to secure the Slide Bar-1 B and APXX together with two M4 Hex Socket Cap screws F. Repeat A5 & A6 for the other side of APXX.
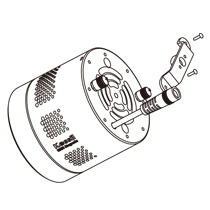
7
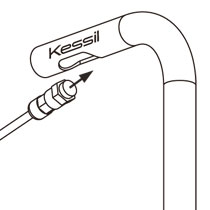
Fit the APXX cable through Arm A and all the way to the end.
*Exercise Caution
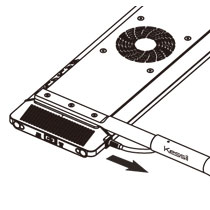
8
Slide the APXX and Slide Bar-1 B into Arm A. Slide both sides at the same time.
*Exercise Caution
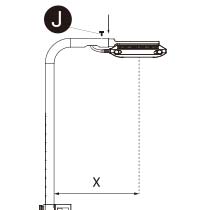
9
Adjust Slide Bar-1 B to your aquarium width. Secure with M3 Thumb screw J. Length X should be half of your aquarium width. For 18" width, X=9"; For 24" width, X=12".
10
Installation completed. Please be cautious when making adjustments.
A3XX
A1XX
1
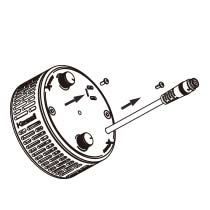
Remove and reserve screws from A1XX/A3XX for step B2.
A3XX
A1XX
2
Secure designated bracket / A3XX Bracket H to unit with screws from step B1.
*The A150/A160 bracket comes with the light.
A3XX
A1XX
3
Slide Slide Bar-1 B into Arm A and secure them with M3 Thumb screw J. Combine Slide Bar-1 B to 90 Degree Adapter G with one M4 Hex Socket Cap screw F using M4 Hex Key M. Tighten 90 Degree Adapter G into A1XX/A3XX bracket (with light).
A3XX
A1XX
4
Fit power supply cable through the bottom of the Arm A and connect to Power Cord of the unit.
Secure Mounting Arm on aquarium following steps A1 to A3. Adjust Slide Bar-1 B to your aquarium width. Secure with M3 Thumb screw J.
Installation completed.
1
Remove screws from A360X.
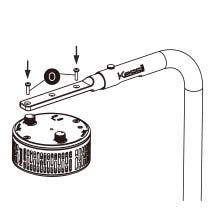
2
Slide Slide Bar-1 B into Arm A and secure them with M3 Thumb screw J.
Combine Slide Bar-1 B to A360X using M3 Phillips Cap O.
3
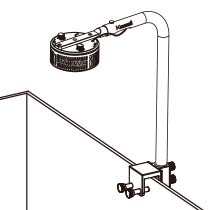
Fit power supply cable through the bottom of the Arm A and connect to Power Cord of the unit.
Secure Mounting Arm on aquarium following steps A1 to A3. Adjust Slide Bar-1 B to your aquarium width. Secure with M3 Thumb screw J.
Installation completed.